Scalloped Frosting Tutorial
This technique for decorating a cake is so easy and simple! You don't need any fancy tools to make this design. In minutes you can transform you cake into a beautiful eye catching dessert with little skill required. I'll show you!
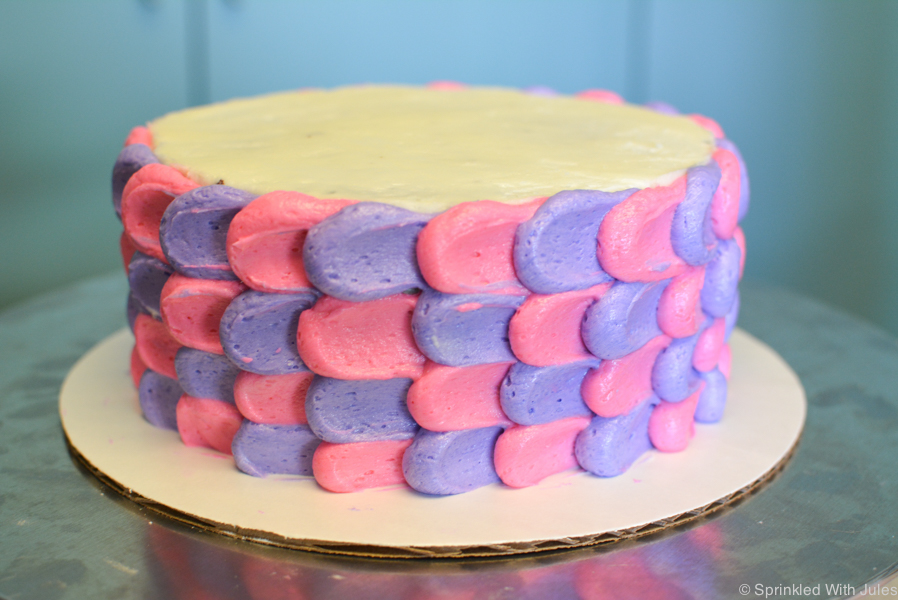
I've done many cakes with this design, and I think it is so fun! I usually stick with a monochromatic design, but I was making this cake for a friend's baby's birthday and it was Alice In Wonderland themed. She wanted pink and purple, and I thought it turned out really neat. The alternating bright colors were perfect for her theme! You could do multiple colors, or stick with just one. Adding another color isn't too difficult!
In case you're interested, here are the tools I used to make this cake (with links):
If you don't have access to these items, there are some common household items you could use in a pinch, though your results might not come out as good as they could. Instead of a piping bag, you could use a zip-top bag filled with frosting, and the bottom corner cut off. If you don't have an offset spatula, you might be able to try a butter knife.
Let's get to it!
1. Start by piping a vertical column of dots, starting at the bottom and working your way up. If using multiple colors, alternate accordingly.

2. Using an offset spatula about 3/4 of an inch wide (it should fit right inside the dots you made), gently press into the dot, starting at about the center, and smearing it outwards.

Press, and smear... ta-da!

3. Wipe off the spatula after smearing each dot. Continue to work your way up the cake until you have smeared all the dots. Then (alternating colors if desired), place another column of dots over the end of your smears.

4. Repeat smearing!
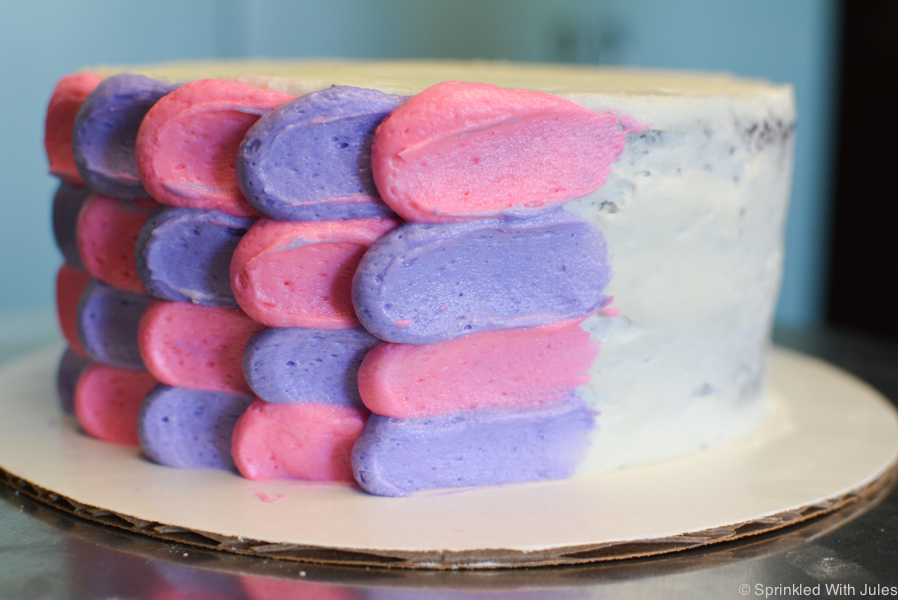
5. Continue all the way around the cake until you have covered it entirely. There will be a "seam" where the end meets the beginning, and this will be the back of the cake.
Top the cake with a spiral of more scallops or cover it in dots like I did! I thought the disarrayed peaks went with the crazy theme.
Did I convince you to try this technique? Let me know if you try it! And please tell me any tutorial requests you have for the future!
Happy baking.

Sprinkled With Jules is a participant in the Amazon Services LLC Associates Program, an affiliate advertising program designed to provide a means for sites to earn advertising fees by advertising and linking to amazon.com. Thank you for your support!